
Click on pictures for higher-quality
images.
Headless
Prototype A 2017
I
have some wood I plan to use for a build, but the pieces aren't very
big, so I decided a headless design would be the best approach.
Since that meant designing a body, using unfamiliar hardware, and my
first attempt at designing and building a neck from scratch, I figured
I should start with a prototype. Further details below.

The wood came from the local home supply store. The neck
is from an oak 4x4 (which appears to have been laminated from several
pieces). Oak was the only wood I could find locally that seemed likely to
be hard enough for a neck. I couldn't find much written about using oak
for a neck, but it seemed plausible. The body uses 0.75 inch
spruce. Again, there wasn't an abundance of choices available. I
figured they make acoustic tops out of spruce, so why not?
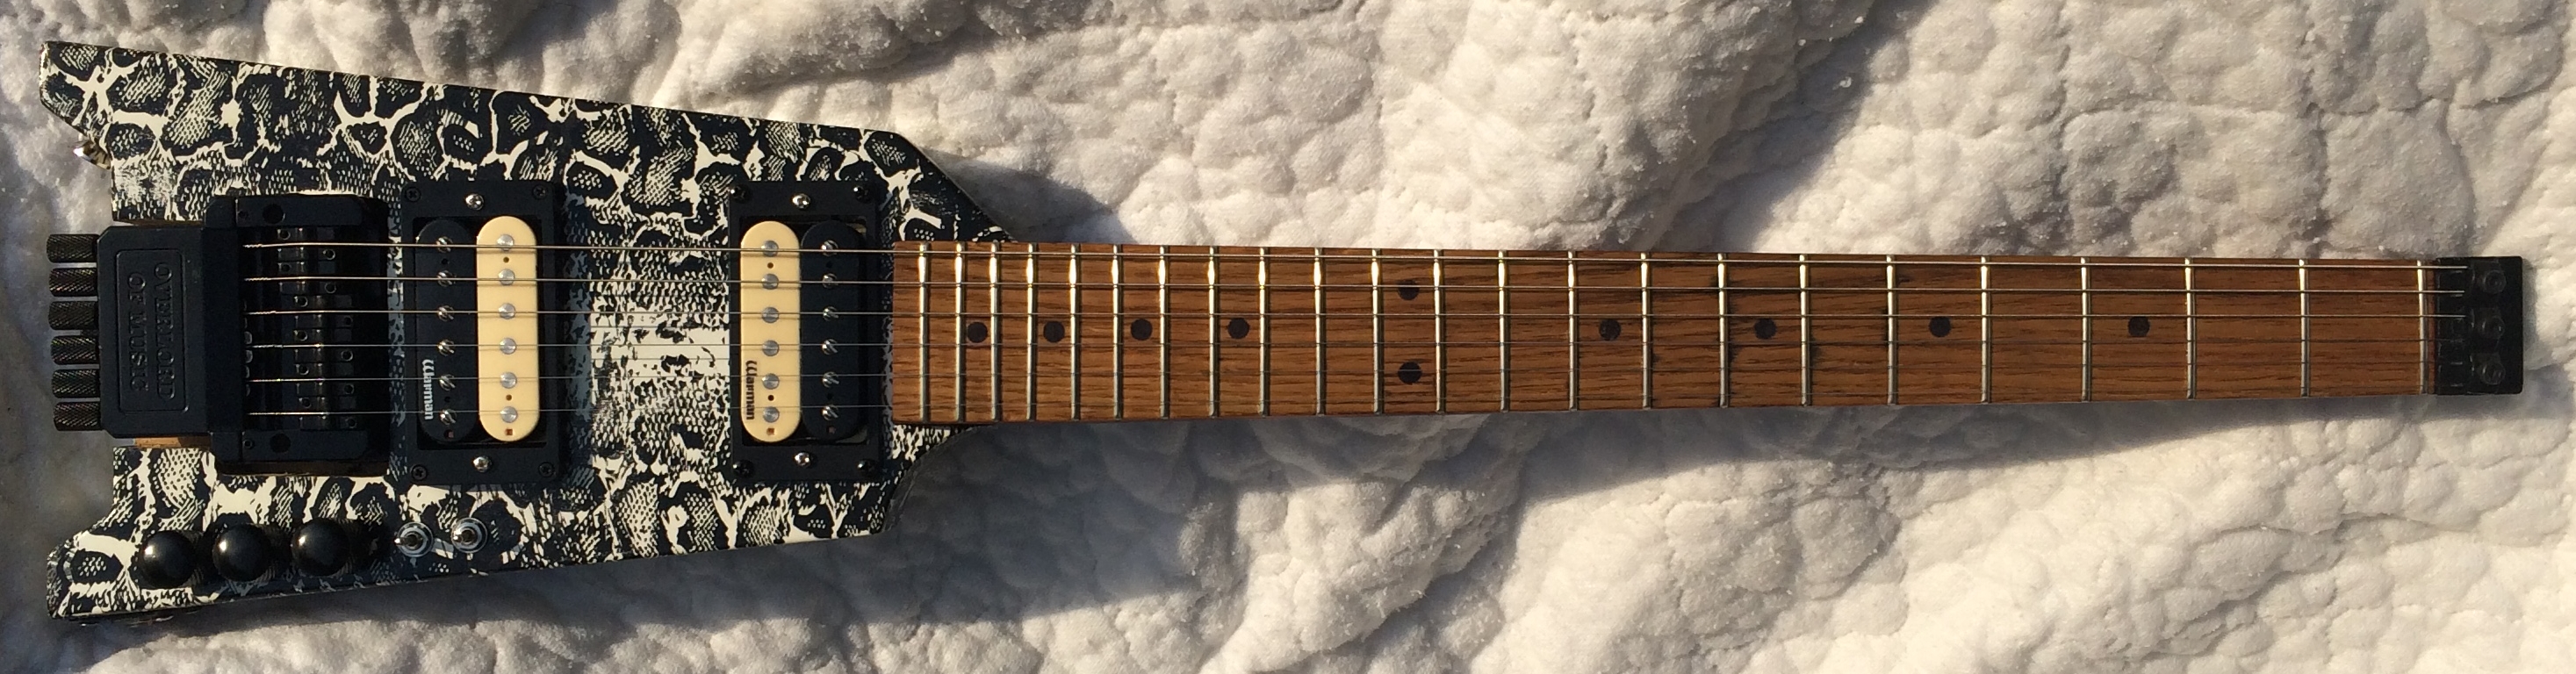
The headless nut and bridge are Steinberger knockoffs from EBay, and the
pickups are 4-wire humbuckers from Warman Guitars—an
affordable pickup I read good things about. I used a "Hot Rod"
dual truss rod from StewMac in the neck.
I split the oak lengthwise and cut to the length and tapered width of the neck,
extrapolating from other guitars on hand. I cut the headless end to match
the headless nut. After reviewing dozens of YouTube videos and blogs, I
set out to rout the back of the neck for truss rod placement. I soon
realized I should have done this before routing the trapezoid shape of the neck
so I could've used a straight edge for a guide, since routing the truss rod
slot turned out pretty messy doing it freehand. But I eventually got it
passable. I inserted the truss rod, then glued in a skunk strip I cut
from the leftover piece of oak. The fit was rough, and it required some
wood filler, but later after staining it actually turned out much nicer than I
thought it would.
I then used a fret layout ruler to make lines for frets at a 24.562 inch scale
to draw lines for fret locations and spots for fret markers. I cut the
fret slots with a StewMac fret saw, just clamping a
straightedge at every line as a guide. The first couple were a little
messy, but I got the hang of it.
I drilled holes for fret markers. I was originally going to use abalone
dots, but I decided to try dying wood filler and applying that, sanding
flat. The result was less than stellar; it was hard to get the color even
and keep the filler smooth, and I had to touch it up several times along the
way.
I did the same thing for the side dots. This was a mistake, since I
hadn't radiused the fretboard yet, and when I did that it put the side dots way
too close to the edge.
I got a 12-inch radius sanding block, and sanded the fretboard to that radius,
touching up the fret markers as required after that. After radiusing I
also had to deepen the fret slots a bit further.
Next came inserting the fret wire. I cut pieces to approximate length,
and hammered them in one at a time, adding a touch of wood glue in the
slots. After doing 4-5, I clamped with the radius block for a few hours
at a time. When done, I nipped the ends of frets approximately flush, and
started looking at finishing the frets. I discovered some of the fret
slots were too shallow, meaning I had a lot of filing to do. I filed
frets more or less flat, then dressed the edges the best I could with hand
files. Then I leveled the frets one at a time compared to their
neighbors, and sanded progressively to 1200 grit and finally steel wool.
All this takes a while, and acquiring some more task-specific tools will be in
the cards for the next attempt at this project.
Next was carving the curvature of the back of the neck. This is pretty
much a do-it-by hand effort. I used an assortment of rasps, files, and
coarse sandpaper to gradually approach the profile of a guitar neck. I
made a curved sanding block approximating the radius of some of my other guitar
necks to help with this process. You do a lot of this by sight and feel,
and using calipers along the way to know when the neck is approaching the
appropriate thickness.
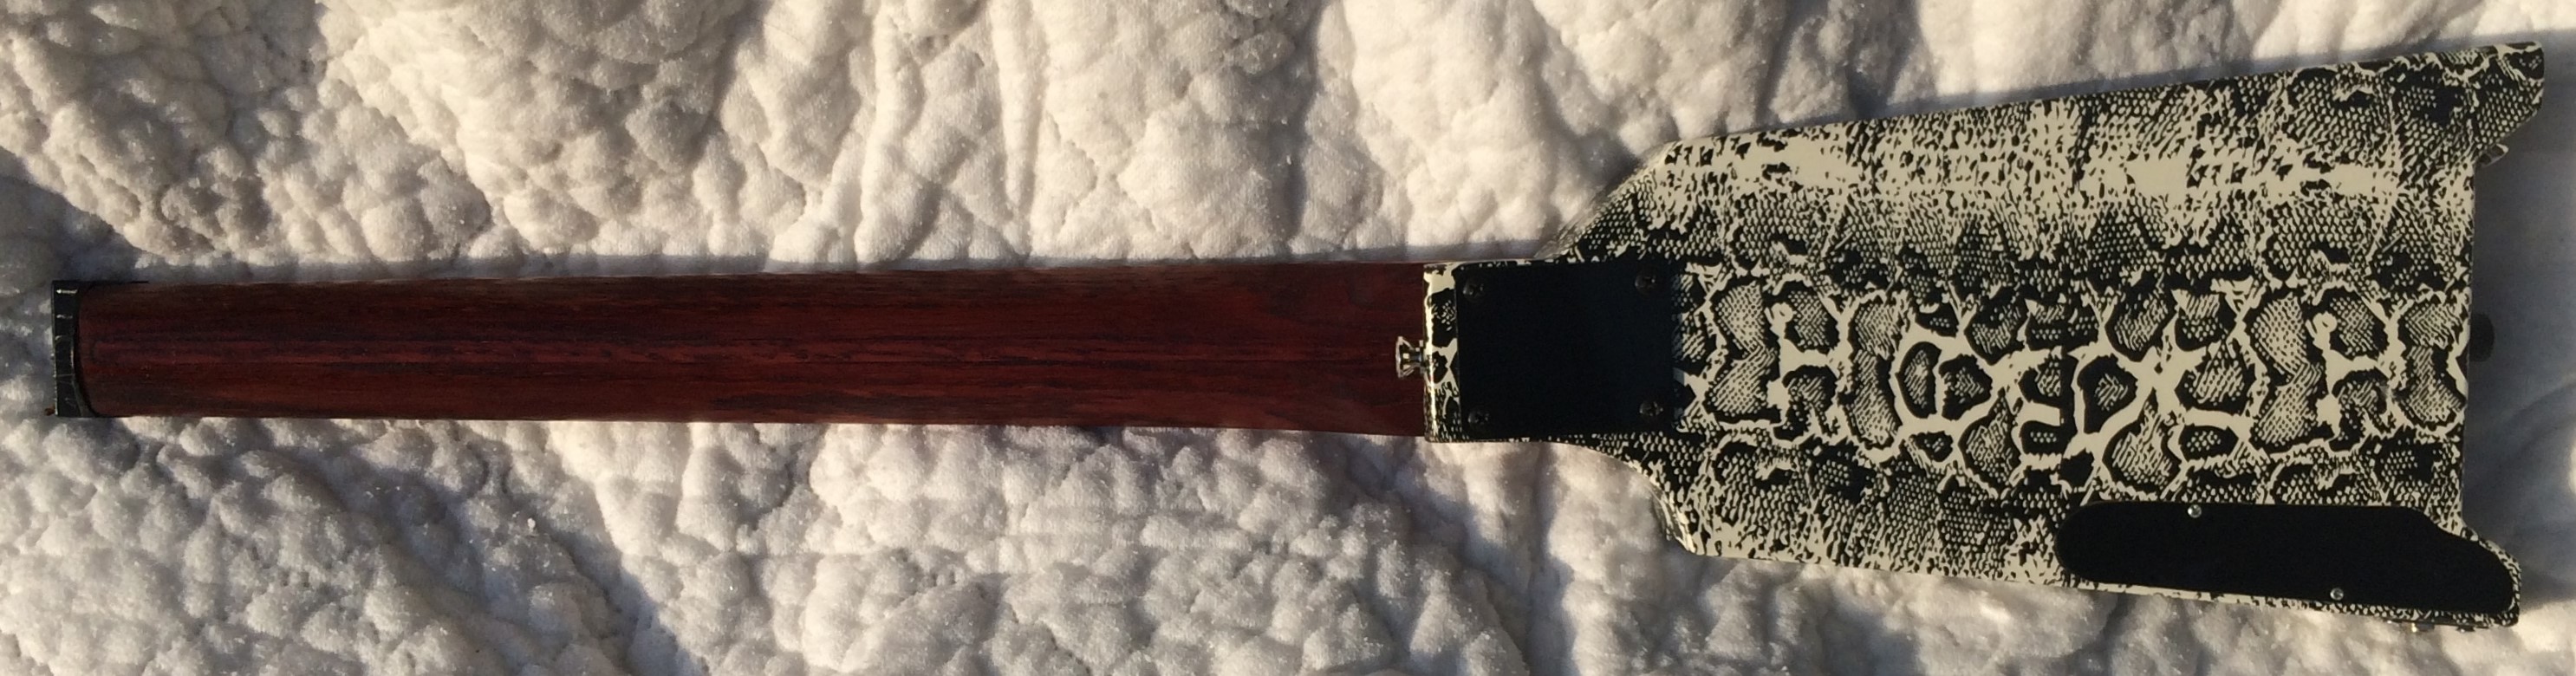
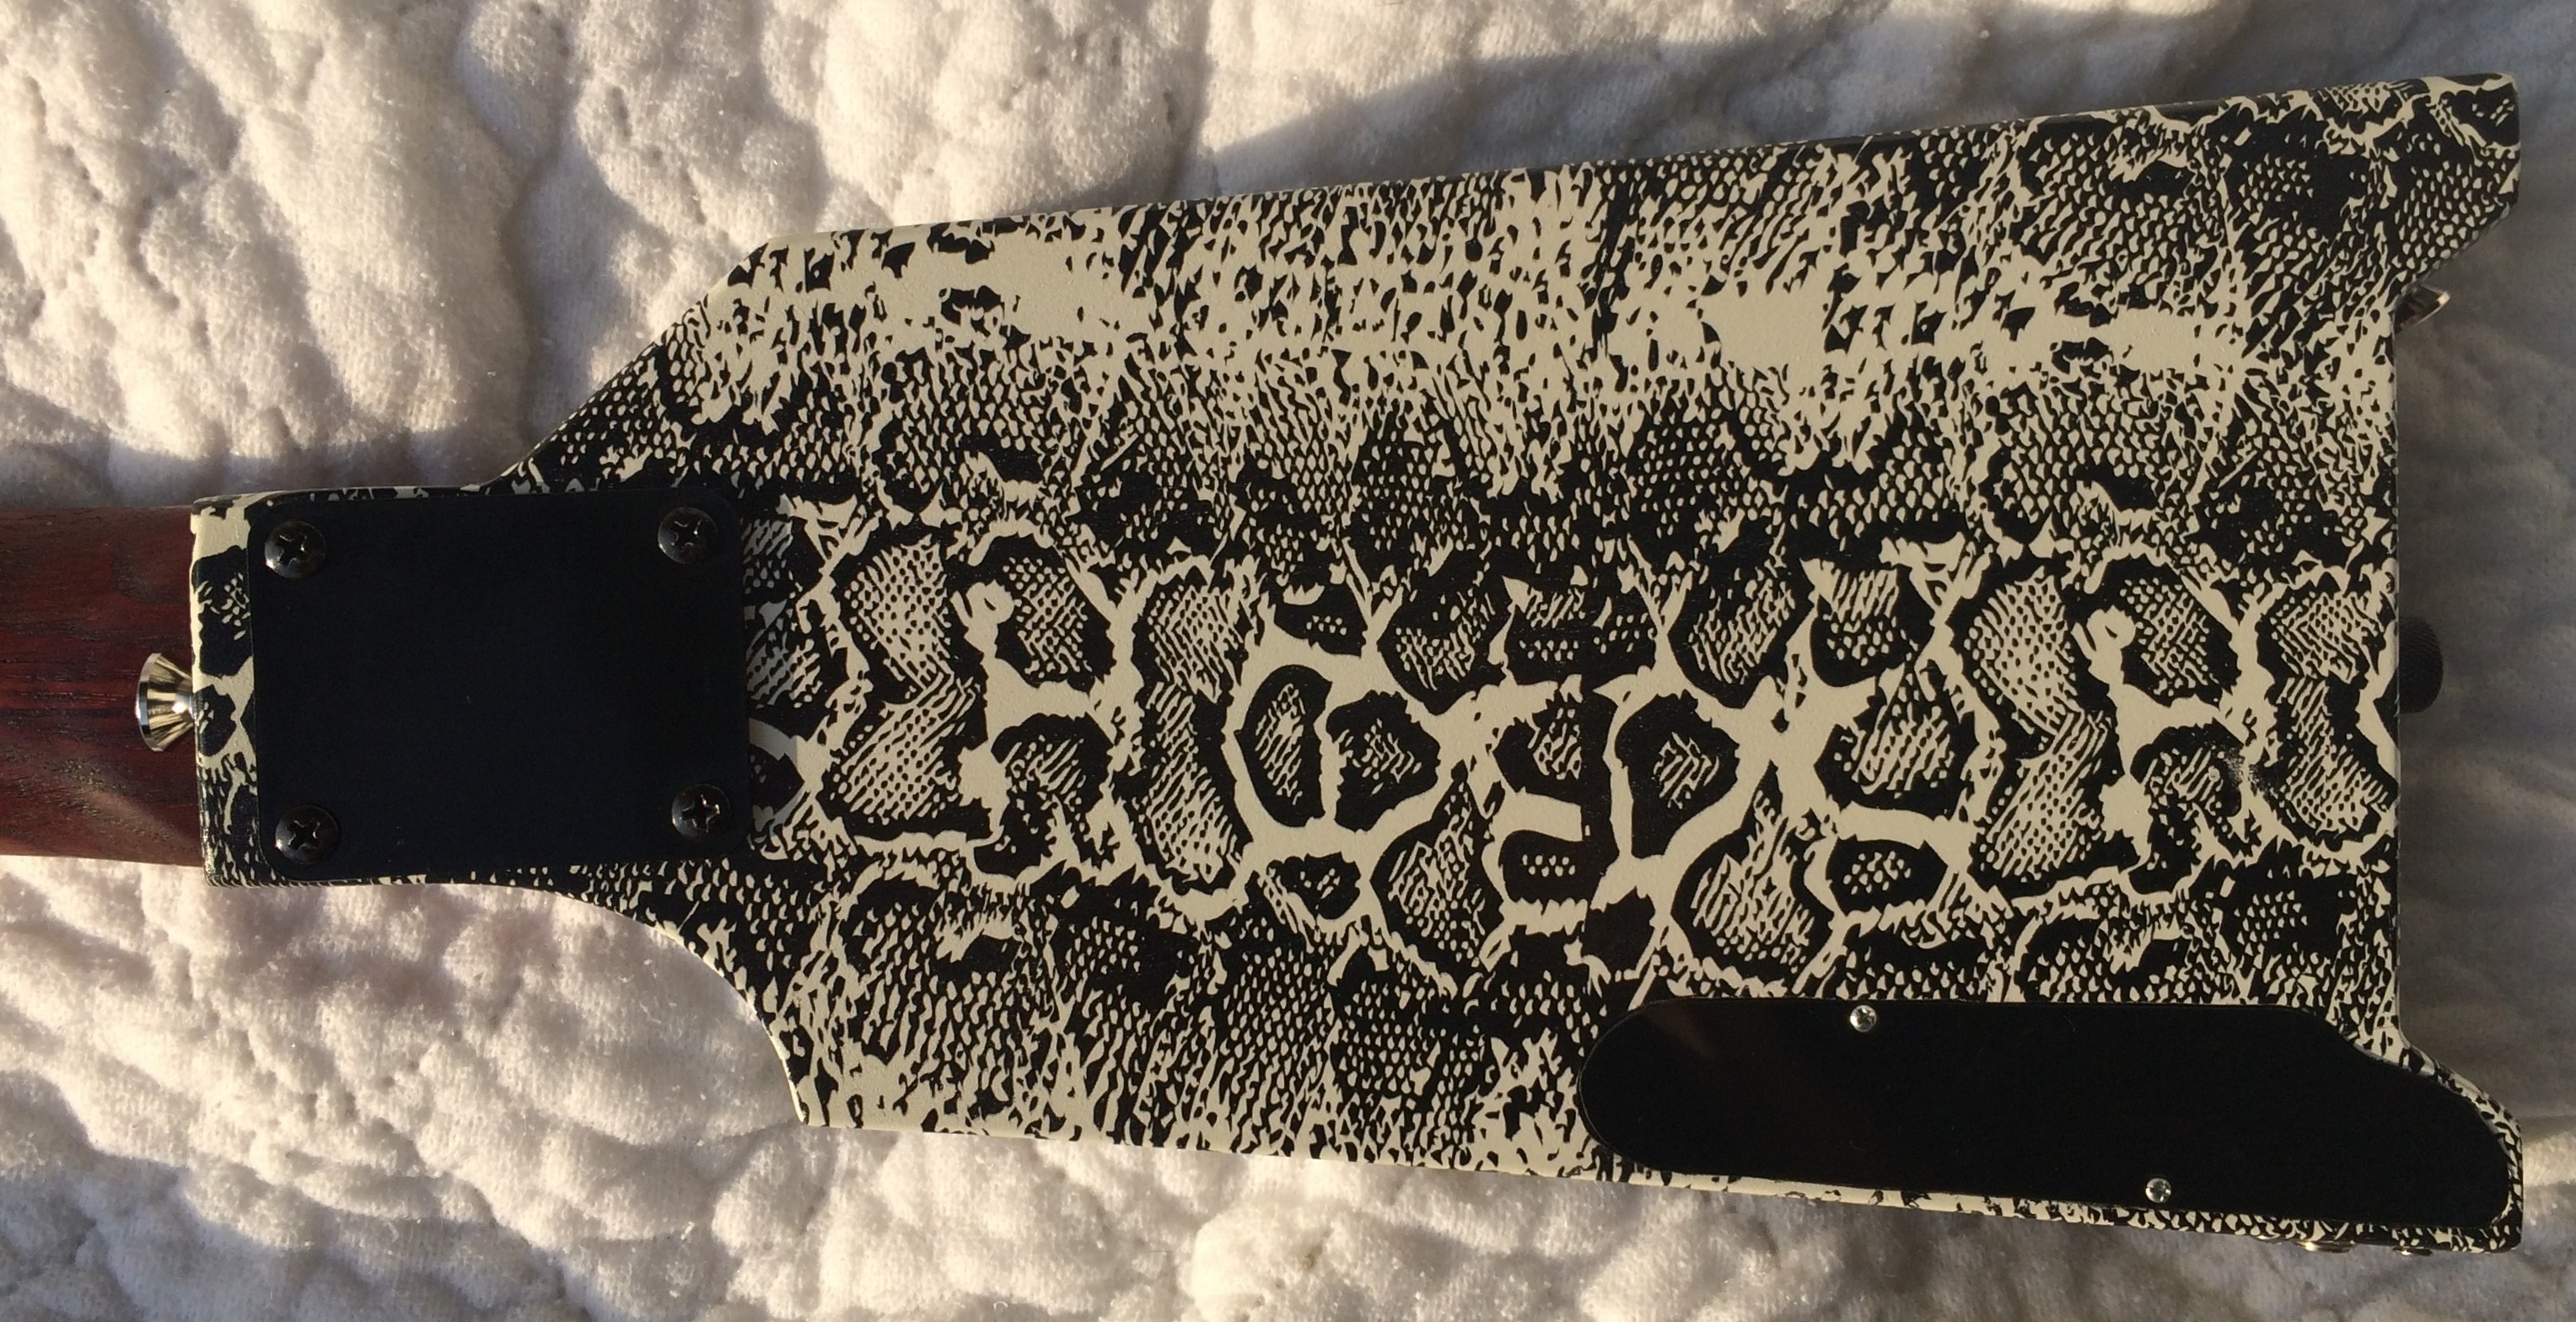
After that, it was time to make a body. I needed it to be as narrow as possible
to make the best use of the wood I have on hand. I drew out a lot of
designs, but ended up with something fairly similar to old Steinberger and
Kramer headless guitar bodies.
A frustrating puzzle was figuring out the rout for the bridge, since it came
with no instructions, and I found little guidance on the Internet. So I
basically reverse-engineered it from the bridge itself. The other thing
that comes into play is that the depth of the neck slot compared to the bridge
rout has to end up such that: 1) strings pass at the right height over
upper frets and pickups, 2) neck-mounting screws pass an appropriate depth into
neck, and 3) bridge-mounting screws don't pass through body and out the
back. This was a tedious collection of variables to sort out.
The other problem was that I was using 0.75 inch boards for the body.
Gluing two together would make the body 1.5 inches thick—too shallow for the
bridge mount. Gluing three made it 2.25, which just looks way too thick,
and becomes too thick to mount the neck. I eventually cut the body
pattern into three pieces of the board. I routed all the wiring pathways
into the middle piece, then glued the three together. A ton of sanding
and patching later I had smooth edges.
A lot of trial and error went into the neck and bridge rout depths. I
eventually had to rout off about 0.25 inches thickness from the back of the
guitar, resulting in a final thickness of about 2 inches. This let me
mount the neck with the stock neck plate screws, and I got some shorter screws
to mount the bridge without the screws coming through the back.
Routing the instrument cavity required keeping it as narrow as possible to keep
the body narrow, but still giving you room to insert the electronics.
Again quite tedious, and I made it just barely big enough. It was routed
from the back to about 0.25 inch thickness from the front so that switches and
pot stems could pass through holes.
Next I primed the body and proceeded to use hydrographic film to do a
water-transfer of a snakeskin pattern onto the body. Way cool, and while
it look a bunch of YouTube time and some practice, this actually worked out
fairly easy.
I wiped on some red mahogany ColorTone dye to color
the back of the neck, with vintage amber to the fretboard side. I wiped
polyurethane on both the neck and body as a clear coat. Of course, I let
some drips accumulate on the body, requiring sanding and a less than stellar
end result.
After that, it got bolted together, and the electronics were inserted. I
used on-off-on DPDT toggle switches for the pickups, so I could choose series
or parallel wiring for each, coupled with one volume and one tone. A lot
of wiring to puzzle through, and a whole lot of soldering and tedium to get
this all into the way-too-narrow instrument compartment without shorting
something out, but it eventually got done.
Next it got strung up, along with bridge saddle height and coarse intonation
adjustment. Amazingly, it was pretty playable right off the bat.
There was some fret buzzing over the upper frets, but nothing that was
problematic amplified. I did all this with the whammy bridge blocked off
to make it fixed, then released the bridge and dialed in string tension to get
it back in tune. I intended to use it as a fixed bridge, but realized
that, aside from threading the whammy bar holes, it's the same as a floating
bridge, so I figured I'd see how that worked out.
I played it for several days, re-tuning as I went. Unfortunately, after a
week I was still constantly having to retune; all strings were going flat every
time I turned about. I eventually just locked the bridge back in place to
make it fixed.
As for sound, it's basically a two-humbucker rocker. Not a lot of depth
and character to the clean sounds, but that's not a surprise with budget parts
and hardware store lumber. But having series and parallel options for the
pickups balances that out nicely, and the distorted sounds are quite nice.
It would be safe to assume that everything above is a sanitized
oversimplification. I botched up just about every step of the
process,
requiring a lot of patching and re-thinking along the way. But
the
learning experience is the purpose of a prototype, so in that regard,
mission
accomplished. It's amazing what you can do when you know what
you're
doing, but even more amazing what you can accomplish when you don't
know what
you're doing. I played it for about four years, while also using
it as a guide for later headless builds, then gave it away to a friend
of my daughter.